In this article, we will understand how SPFx solutions built for MS Teams and SharePoint portals, could be automatically packaged and uploaded into app catalog portals. This automation is achieved with the help of Azure Devops and Github version control systems. Using devops ensures us the continuous delivery of changes onto the target platforms.
Remember, we will be targeting the webparts of this solution for SharePoint and as tabs for Microsoft Teams. Let us use github repositories as a version control tool for storing the solution. You will understand, how github could be easily integrated with Azure Devops for automating the packaging processes in this article.
Create the SPFx solution, that is compatible for SharePoint online portals. The SPFx solution (available on the github https://github.com/nakkeerann/globalspfxsoln) contains, the azure-pipeline configuration file template for setting up the build pipelines. The following snapshot shows the configurations for creating SPFx solution.
Push the code into Github using the git commands. For example, below commands are used for my repository.
git initgit add .git commit -m "first commit"git remote add origin https://github.com/nakkeerann/globalspfxsoln.gitgit push -f origin master
Install the Azure Pipelines to your Github account https://github.com/marketplace/azure-pipelines . Select the repositories required to install pipelines. Authorize azure pipelines.
Create an Azure Devops project as shown below.
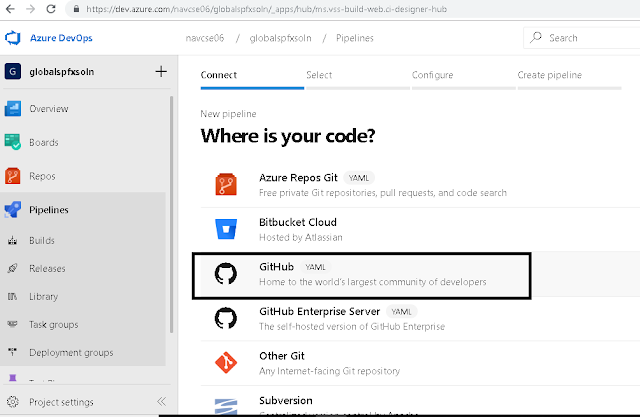
Once created, In the new pipeline, select github option to connect. Authorize, if prompted for access.
Create a pipeline by selecting a repository.
Configuration of Pipeline Template: This template will have the tasks for setting up the environment, build the solution, and packaging the solution.
If the repository contains the azure pipeline (azure-pipeline.yml) configuration file, then the same will be auto populated on the create pipeline screen. The azure-pipeline template available on the github project will now be available on the devops project for automation. You have to click run for configuring the pipeline for this project.
If the repository contains the azure pipeline (azure-pipeline.yml) configuration file, then the same will be auto populated on the create pipeline screen. The azure-pipeline template available on the github project will now be available on the devops project for automation. You have to click run for configuring the pipeline for this project.
The pipeline is built for the project. The snapshot shows the options configured in the template. This build activity with steps listed will be repeated, whenever there are changes to the code in Github.
Pipeline Releases: This step ensures, of uploading the packages from the build paths into the Apps catalog sites.
Click release button available on the pipeline build success page from the previous screen. For the release template, start with an empty job.
Click release button available on the pipeline build success page from the previous screen. For the release template, start with an empty job.
Artifacts is already configured. And tasks are empty on the stage. This screen enables us to set the automation script for uploading the built packages into apps catalog portal. Thus ensuring the continuous delivery of packages, whenever build succeeds.
Select view stage tasks, and configure below tasks, by selecting add a task to agent job.
Script parameters are pulled from the variables configured on the pipeline.
Save, and click on new release on top.
Deploy the Release.
As per configuration, the below snapshot shows the activities of release
The app will now be available on the apps catalog site configured as URL on the release template.
Test Automation
Now let us test, how the changes are being deployed into the sites. The change would be, to make the app available for teams.
If you navigate to azure pipeline, where the project is configured, you could see the rebuilding process after the code change.
If continuous deployment is enabled on the release, the release process run will now run and complete the release process. Here the script will re-upload the package into Apps catalog site.
To make the app available on the Microsoft Teams, navigate to the apps catalog site, select the app and deploy. Then select Sync to Teams option.
Later the app could be added as a tab on teams. The following snapshot shows the tab being added.
Note: Manifest file (under teams folder) contain the team details, which could be used as a package reference. IF you are working with multiple webparts/tabs in the same solution, then you need to add one more manifest file for next web part, compress the manifest and related icons into a folder. Then from teams store, you could upload the zip folder. This will enable, new component to be available on the Microsoft Teams.


