Monday, 13 June 2016

Retrieve Delve Boards And Their Documents From Office 365 Using REST API


In this post, you will learn how to retrieve boards and documents (added to board) from Office 365 Delve, using REST API. Jquery Ajax and search APIs are used to perform the operation.


Retrieve Boards:


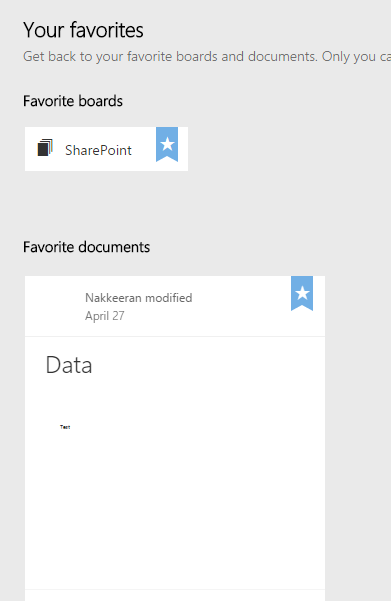
Board is just a way to categorize the documents on the site. The operation shown below will fetch all the board names that the user has added it to his documents. Say for example, user has added board called “Cricket” to two documents and “Tennis” to one document. This means the user is following two boards. They are Cricket and Tennis (these values will be listed on Delve left pane). There can be boards added by other users as well, which will not be listed on the user's Delve page. We will see how we can retrieve these boards from Office 365 Delve.
  • The search API is used to pull the information. 
  • The necessary parameters to query the board details are the query text and properties. In the query text, we need to pass the path to get the board names available on Delve. We need to set the external content to be true in the properties, so it will retrieve all the properties related to the board.
  • Using Ajax call with get method, retrieve the board names. Set the necessary parameters in the Ajax method.
    1. var getBoardURL = "/_api/search/query?QueryText='Path:\"TAG://PUBLIC/?NAME=*\"'&Properties='IncludeExternalContent:true'";  
    2. $.ajax  
    3. ({  
    4.     url: getBoardURL,  
    5.     method: 'GET',  
    6.     async: false,  
    7.     headers:   
    8.     {  
    9.         "Accept""application/json; odata=verbose"  
    10.     },  
    11.     success: function(response)   
    12.     {  
    13.         // Get the exact result set.    
    14.         var resultSet = response.d.query.PrimaryQueryResult.RelevantResults.Table.Rows.results;  
    15.         // Loop through result set to get the properties for each boards.    
    16.         for (var i = 0; i < resultSet.length; i++)   
    17.         {  
    18.             console.log("Title    : " + resultSet[i].Cells.results[3].Value);  
    19.             console.log("Actor ID : " + resultSet[i].Cells.results[1].Value);  
    20.         }  
    21.     },  
    22.     error: function(data) {}  
    23. });    
From the response, we can get the board names, their corresponding actor IDs, path and other board details.


Retrieve Documents from board:


  • The board actor ID (identified in the section, above) is used to retrieve the respective board documents. 
  • To retrieve the documents, we will the use search API again to pull the information. 
  • The necessary parameters are the query text and properties. In the query text, pass * or any keyword to retrieve the documents. In the properties parameter, pass the graph query along with actor ID (identified in the section, above) of the board and action ID. (Here, action ID should be 1045 to denote the board). Here, we are passing single board actor ID to retrieve the particular board documents. You can change the logic to get multiple board's documents.
    1. var actorId = ""// Set the actor id of board (can be identified from above section) to see the documents.    
    2. getDocumentURL = "/_api/search/query?QueryText='*'&Properties='GraphQuery:actor(" + actorId + "\\,action\\:1045)'"  
    3. $.ajax  
    4. ({  
    5.     url: getDocumentURL,  
    6.     method: 'GET',  
    7.     async: false,  
    8.     headers:  
    9.     {  
    10.         "Accept""application/json; odata=verbose"  
    11.     },  
    12.     success: function(response)   
    13.     {  
    14.         // Get the exact result set.    
    15.         var resultSet = response.d.query.PrimaryQueryResult.RelevantResults.Table.Rows.results;  
    16.         // Loop through result set to get the documents from the board.    
    17.         for (var i = 0; i < resultSet.length; i++)   
    18.         {  
    19.             console.log("Title    : " + resultSet[i].Cells.results[3].Value);  
    20.             console.log("URL      : " + resultSet[i].Cells.results[6].Value);  
    21.             // Similarly other values can be retrieved     
    22.         }  
    23.     },  
    24.     error: function(data) {}  
    25. });   
Note: In these cases, you can check the result values in a Browser debugger console. You can change the logic to display the results on the pages. Place these scripts on the page, using the Web parts (Content Editor / Script Editor / any custom Web part). 

Office 365 Delve Features


Delve provides feasibility for users to view their profile information and their items in one place.

Access Delve Site:


  • Login to your Office 365 site.
  • Click the tile present on the left top corner, you can find the set of apps. Find and navigate to the Delve site.

Search:


From the search box, you can search for the documents or the related items. The items are related to the keyword that will be listed on the home page. The items are pulled from the SharePoint site. The items can be the documents, Emails or other user profiles etc.


Profile:


Click “Me” on the left navigation pane and it will show the user profile information on the right side section. You can click edit profile to change your information. The edit page is similar to SharePoint my site user edit page. You can also find your recent documents section under your profile. This section lists down all your recently created or modified documents on the site. On clicking the "See all" option at the right top of the section, you can find all the documents. The documents are sorted and are based on the last modified time value (descending order). You can still filter out the items that are based on the file types.


Documents:


  • For any document, you can mark a document as a favorite document.
  • You can add the document to a board.
  • You can mail the document by using client apps.
  • You can view the permissions for the document.
  • You can find the total views for the document.
  • You can view the document over the Browser, if you click the document preview. Office Web apps feature is used to view it on the Browser. You can edit the document by using edit in the Browser option and then saving it from file tab.


Board:


The way of categorizing the items on the site.
  • You can add any keyword or board (“SharePoint”) to the document.
  • Once saved, you can find your boards on the left side panel of Delve.
  • Also, from the favorite section, you can find the boards that you have added on the site. On the click of any board (“SharePoint”), you can find out all the documents categorized with corresponding keyword.
  • You can mail your board as a link or remove the board totally. The board or a keyword will be removed from all the documents, categorized as “SharePoint”.


Favorites:


Favorites section will list down all your boards or the items that you have marked as favorite. You can still remove any favorite board or document from the favorites list.


People:


People section will list down a few users from the site. You can navigate to their profile to see their personal information or their documents.

Note: Throughout the process, you can see the page name or URL (“http://siteurl/_layouts/15/me.aspx”) will not change, except for editing profile or for any other external action but the query string will keep on changing, based on the actions.

Add/Remove Custom Ribbon Items on SharePoint List Using CSOM PowerShell


In this post, you will learn how to add or remove custom ribbon items (user actions) on SharePoint list using CSOM Powershell on SharePoint 2013 / SharePoint 2016 / SharePoint online sites.


Steps Involved:


The following prerequisites need to be executed before going for any operations using CSOM PowerShell on SharePoint sites.
  1. Add the references using the Add-Type command with the necessary reference paths. The necessary references are Client.dll, Client.Runtime.dll and publishing.dll.
    Add-Type -Path

    "C:\Program Files\Common Files\microsoft shared\Web Server Extensions\16\ISAPI\Microsoft.SharePoint.Client.dll"

    Add-Type -Path

    "C:\Program Files\Common Files\microsoft shared\Web Server Extensions\16\ISAPI\Microsoft.SharePoint.Client.Runtime.dll"

    Add-Type -Path

    "C:\Program Files\Common Files\microsoft shared\Web Server Extensions\16\ISAPI\Microsoft.SharePoint.Client.Publishing.dll"
  2. Initialize client context object with the site URL.
    1. $siteURL = ""  
    2. $ctx = New-Object Microsoft.SharePoint.Client.ClientContext($siteURL)  
  3. If you are trying to access SharePoint Online site then you need to setup the site credentials with credentials parameter and load it to the client context. 
    1. #Not required for on premise site - Start  
    2. $userId = ""  
    3. $pwd = Read-Host -Prompt "Enter password" -AsSecureString  
    4. $creds = New-Object Microsoft.SharePoint.Client.SharePointOnlineCredentials($userId, $pwd)  
    5. $ctx.credentials = $creds  
    6. #Not required for on premise site - End  
  4. If you are trying to access the SharePoint on premise site then the credentials parameter is not required to be set to the context but you need to run the code on the respective SharePoint Server or you need to pass the network credentials and set the context.
    1. #Credentials for on premise site - Start  
    2. $pwd = Read-Host -Prompt "Enter password" -AsSecureString  
    3. $creds = New-Object System.Net.NetworkCredential("domain\userid", $pwd)  
    4. $ctx.Credentials = $creds  
    5. #Credentials for on premise site - End  


Add Custom Ribbon Items (User Actions) to List:


We will see how we can add the custom ribbon items (actions) to the SharePoint list.
  • Get the existing user action collection. Access the web and get the existing user actions using UserCustomActions property. Load and execute the property.
    1. $web = $ctx.Site.RootWeb  
    2. $userActions = $web.UserCustomActions  
    3. $ctx.Load($userActions)   
    4. $ctx.ExecuteQuery()   
  • Then to the user actions collection, add new custom action. The necessary parameters for new action are registration id, title, registration type and location.
    • Registration Id - Corresponding List template id to add the user action. For example, here 100 denotes the custom list templates.
    • Registration Type -  Denotes association type.
    • location - Custom Action location.
      1. $newRibbonItem = $userActions.Add()  
      2. $newRibbonItem.RegistrationId = "100"  
      3. $newRibbonItem.Title = "Custom Ribbon"  
      4. $newRibbonItem.RegistrationType = [Microsoft.SharePoint.Client.UserCustomActionRegistrationType]::List  
      5. $newRibbonItem.Location = "CommandUI.Ribbon"  
  • Build the xml for the new definition with correspoding handler. In this case, I have considered button as a custom action and associated alert box to the action. You can build your own logic on command action parameter. Location in the xml denotes the place where item will be placed.
  • Update and execute the query.
    1. $ribbonUI = '<CommandUIExtension>  
    2.                     <CommandUIDefinitions>  
    3.                         <CommandUIDefinition Location="Ribbon.List.Actions.Controls._children">  
    4.                             <Button Id="Ribbon.List.Actions.ShowAlert" Alt="Show Alert" Sequence="100"  
    5.                                  Command="ShowRibbonAlert"  
    6.                                  LabelText="Custom Alert"  
    7.                                  TemplateAlias="o1"  
    8.                                  Image32by32="_layouts/15/images/alertme.png"  
    9.                                  Image16by16="_layouts/15/images/alertme.png" />  
    10.                        </CommandUIDefinition>  
    11.                     </CommandUIDefinitions>  
    12.                     <CommandUIHandlers>  
    13.                         <CommandUIHandler Command="ShowRibbonAlert"  
    14.                              CommandAction="javascript:alert(''hi'');"/>  
    15.                     </CommandUIHandlers>  
    16.                 </CommandUIExtension >'  
    17.   
    18. $newRibbonItem.CommandUIExtension = $ribbonUI  
    19. $newRibbonItem.Update()  
    20. $ctx.Load($newRibbonItem)  
    21. $ctx.ExecuteQuery()  
After executing the above steps you can find the new ribbon item on the sharepoint custom list (list tab). The following snapshot depicts the custom ribbon action.


Remove Custom Ribbon Items (User Actions) from List:


We will see how we can remove the custom ribbon items (actions) from the SharePoint list.
  • Get the existing user action collection. Access the web and get the existing user actions using UserCustomActions property. Load and execute the property.
    1. $web = $ctx.Site.RootWeb  
    2. $userActions = $web.UserCustomActions  
    3. $ctx.Load($userActions)   
    4. $ctx.ExecuteQuery()   
  • Delete items
    • If items exists, use filter conditions and filter the ribbon items and assign items in to an array to delete. (Multiple items can not be deleted from the result variable, since the items are present in the enumeration variable. So we are assigning it to array and deleting the items or actions)
    • From the array, delete the items and finally execute the query.
      1. $itemsToDelete = @()  
      2. if($userActions.Count -le 0){  
      3.     Write-Host "No Ribbon Items found to delete"  
      4. }  
      5. else{  
      6.     foreach($userAction in $userActions){  
      7.         $itemsToDelete += $userAction                  
      8.     }  
      9.     foreach($item in $itemsToDelete){  
      10.         Write-Host "Deleting Ribbon Item : " $item.Title  
      11.         $item.DeleteObject()  
      12.     }  
      13.     $ctx.ExecuteQuery()  
      14. }  
The above operation deletes all the custom ribbon items from the site. You can filter out to the exact ribbon item from the for each loop and delete the item(s).

Upload And Set Custom Master Page To Site Using CSOM PowerShell On SharePoint

In this article post, you will learn how to upload custom master page to master page gallery and apply custom master pages to the site using CSOM Powershell on SharePoint 2013 / SharePoint 2016 / SharePoint online sites.


Steps Involved:


The following prerequisites need to be executed before going for any operations using CSOM PowerShell on SharePoint sites.
  1. Add the references using the Add-Type command with the necessary reference paths. The necessary references are Microsoft.SharePoint.Client.dll, Microsoft.SharePoint.Client.Runtime.dll.
    1. Add-Type -Path "C:\Program Files\Common Files\microsoft shared\Web Server Extensions\16\ISAPI\Microsoft.SharePoint.Client.dll"  
    2. Add-Type -Path "C:\Program Files\Common Files\microsoft shared\Web Server Extensions\16\ISAPI\Microsoft.SharePoint.Client.Runtime.dll"  
  2. Initialize client context object with the site URL.
    1. $siteURL = ""  
    2. $ctx = New-Object Microsoft.SharePoint.Client.ClientContext($siteURL)  
  3. If you are trying to access SharePoint Online site then you need to setup the site credentials with credentials parameter and load it to the client context. 
    1. #Not required for on premise site - Start  
    2. $userId = "abc@abc.onmicrosoft.com"  
    3. $pwd = Read-Host -Prompt "Enter password" -AsSecureString  
    4. $creds = New-Object Microsoft.SharePoint.Client.SharePointOnlineCredentials($userId, $pwd)  
    5. $ctx.credentials = $creds  
    6. #Not required for on premise site - End  
  4. If you are trying to access the SharePoint on premise site then the credentials parameter is not required to be set to the context but you need to run the code on the respective SharePoint Server or you need to pass the network credentials and set the context.
    1. #Credentials for on premise site - Start  
    2. $pwd = Read-Host -Prompt "Enter password" -AsSecureString  
    3. $creds = New-Object System.Net.NetworkCredential("domain\userid", $pwd)  
    4. $ctx.Credentials = $creds  
    5. #Credentials for on premise site - End  


Upload and Apply Master Page:


We will see how we can upload the master page file from local system to master page gallery and apply the uploaded master page to the site.
  • Get the master page from local.
    • Get the master page file local system URL and access the properties of master page file using Get-ChildItem method.
    • Then read the master page content using ReadAllBytes method and initialize the content to variable ($fileBytes).
      1. $pageFilePath = "D:\custom.master"  
      2. $pageFilePath = Get-ChildItem $pageFilePath  
      3. $fileBytes = [System.IO.File]::ReadAllBytes($pageFilePath.FullName)  
  • Set the master page file details.
    • Initialize file creation information object to set the master page file properties to be uploaded. 
    • To the object created, set the necessary parameters like URL, content. Overwrite parameter can be used to force write the file to the server.
      1.   
      2. $newFileInfo = New-Object Microsoft.SharePoint.Client.FileCreationInformation  
      3. $newFileInfo.Url = $pageFilePath.Name  
      4. $newFileInfo.Content = $fileBytes  
      5. $newFileInfo.Overwrite = $true  
  • Access the folder and add the master page.
    • Using the context, access the web. It should be root web since master page gallery is present at the top level site.
    • Then access the master page gallery folder using web and GetByTitle method.
    • From the web, get the source list and destination list using the list names. Then access the appropriate folder and the files method to add our new master page. Add new file creation information object created above. Load and execute the query.
      1. $web = $ctx.Site.RootWeb  
      2. $folder = $web.Lists.GetByTitle("Master Page Gallery")  
      3. $masterPage = $folder.RootFolder.Files.Add($newFileInfo)  
      4. $ctx.Load($web)  
      5. $ctx.Load($masterPage)  
      6. $ctx.ExecuteQuery()  
  • Publish as major version.
    • Then to publish the master page, we need to check out the file. Check out is required since the master page is neither checked out nor checked in as major version when the master page is uploaded. Load and execute the query for check out operation.
    •  Then check in the master page with comments and check in type. Check in type should be major version.
      1. #Check Out  
      2. $masterPage.CheckOut()  
      3. $ctx.Load($masterPage)  
      4. $ctx.ExecuteQuery()  
      5. #Check In and Publish  
      6. $masterPage.CheckIn("Majorversion checkin",[Microsoft.SharePoint.Client.CheckinType]::MajorCheckIn)  
      7. $ctx.Load($masterPage)  
      8. $ctx.ExecuteQuery()  
  • We have successfully uploaded the master page. No we will apply the master page to the site. 
    • From the web object, access the custom master url property and set the master page relative url. 
    • To set master page for custom pages, use CustomMasterUrl property. 
    • To set master page for system master pages, use MasterUrl property. 
    • After setting the properties, update the web object. Then load and execute the web object with the context.
      1. $web.CustomMasterUrl = $masterPage.ServerRelativeUrl  
      2. $web.MasterUrl = $masterPage.ServerRelativeUrl  
      3. $web.Update()  
      4. $ctx.Load($web)  
      5. $ctx.ExecuteQuery()  
The above steps will help us in uploading and setting the master page. The article focused on setting master pages for root level sites. If the master page needs to be set for subsite, then corresponding web object needs to be created before applying master page.